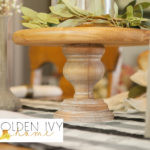
DIY Wood Cake Stand
Cost: $20
Equipment
- Nail Gun
- Power Drill and Drill Bit
- Tape Measure
Materials
- 1 Short Furniture Leg
- 1 Round Wood Plaques - 4"
- 1 Round Wood Plaques - 5"
- 12in Round Wood Panel
- 2.5in Screw
- Wood Glue
- Stain of Choice
- Annie Sloan White Wax
- 2 Paintbrushes
- Rags
Instructions
- Use the tape measure and find the center of the 12in wooden round. Using a drill bit slightly smaller than than the screw on the furniutre leg, drill halfway through the 12in round.
- Add some wood glue around the screw on the furniture leg and screw the furniture leg into the 12in round until it fits tight.
- Using the tape measure mark the center on the 4in and 5in round plaques.
- Drill a hole all the way through both of the plaques and partially into the bottom of the furniture leg.
- Add some wood glue to both of the plaques around the holes and to the bottom of the leg.
- Take your 2.5in screw and screw the 5in into the 4in up into the leg until it is tight.
- Using your paintbrush, apply the stain to the whole cake stand. Let the stain soak in and then wipe back any remaining stain with a clean rag.
- Once the stain has dried apply the Annie Sloan White Wax to the leg and plaques with a brush. Let sit for a few minutes then take a clean rag and wipe off the excess.
- I then applied a buther block sealer to the top of the cake stand to protect it.
Notes
I still always cut a round piece of parchment to lay down before I put my food on it.